How to Crochet Corner To Corner (C2C)
This post may contain affiliate links. If you make a purchase through links on our site, we may earn a commission. As an Amazon Associate, I earn from qualifying purchases.
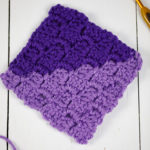
Crocheting Corner to Corner (C2C) looks difficult, but after a few rows, it is easy. I love how quick these projects can work up. Perfect for making crochet afghans or graphgans.
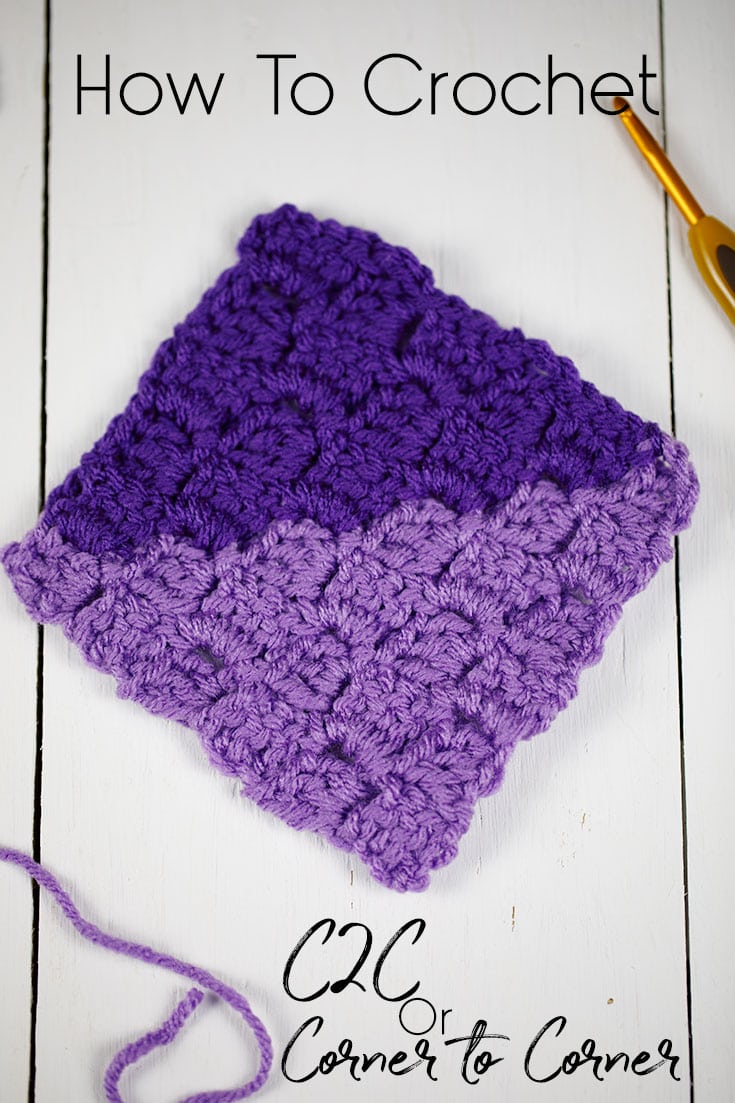
Corner to Corner crochet (or C2C, for short) is a series of double crochets stitched into squares. These squares begin at one corner of your work, and end at the opposite diagonal corner, giving your work a beautiful textured pattern across.
Corner to corner crochet is typically used in projects such as blankets or
However, they aren’t limited to just those projects. I’ve seen many people also create dishcloths, clothing, and even table runners for the dining room.
Corner to Corner Crochet Tutorial
To begin a corner to corner crochet project, you’ll need to learn the basics.
Once you have the basics down, you can apply them to any pattern or graph you might have for your finished project.
Note: Select your hook size based upon the type of yarn you’ve chosen to use. Our tutorials are based on acrylic yarn, weight: 4, hook size: H (US standard terms).
Step 1: Make a slip knot on your crochet hook.
Step 2: Chain 6.
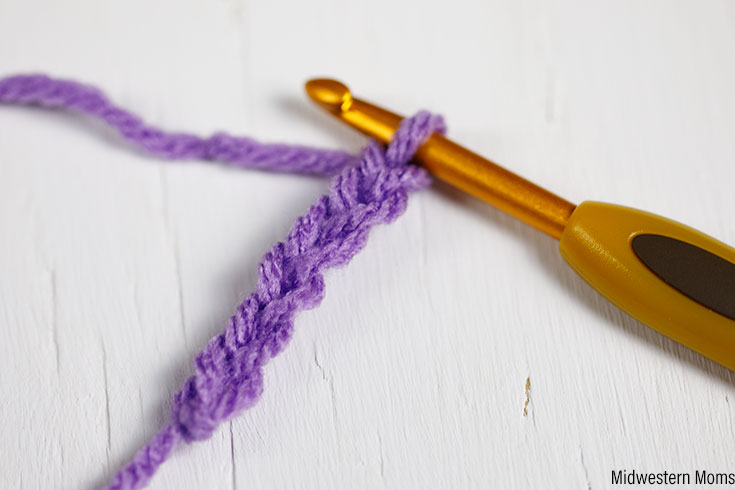
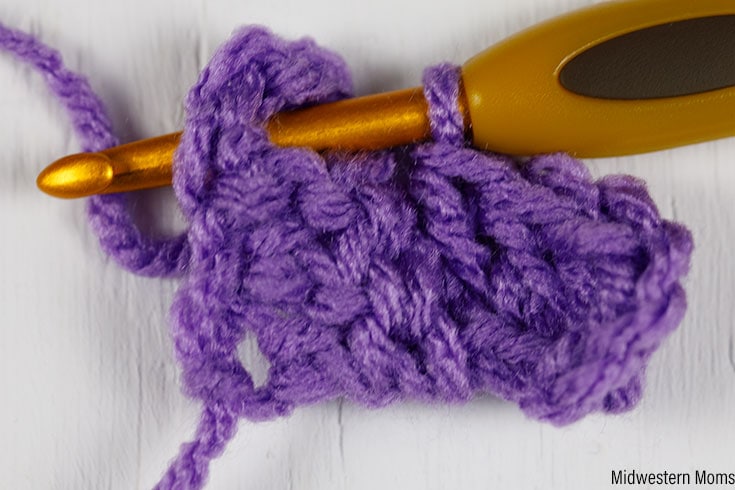
Step 3: Double Crochet (DC) into the 4th chain from the hook and the following 2 chains. (Total of three double crochet stitches.) This completes your first block and is considered Row 1.
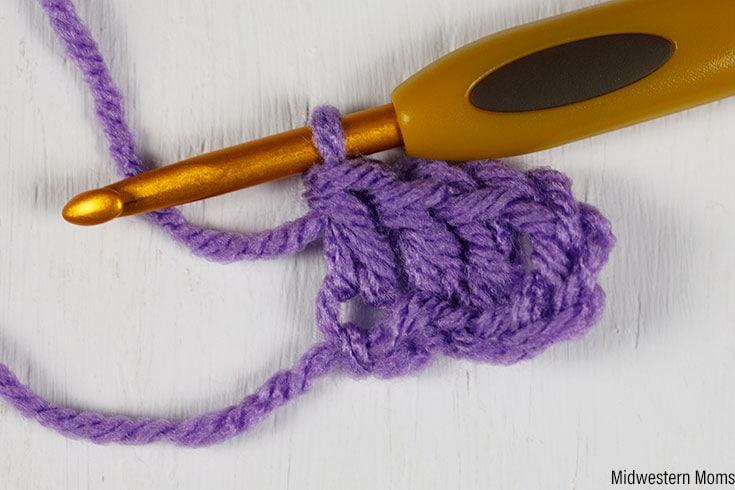
Step 4: Turn your work.
Step 5: Chain 6.
Step 6: Double Crochet into the 4th chain from the hook and into the next 2 chains. Note: You might have to tilt your work toward you a bit in order to see the chains you should crochet into.
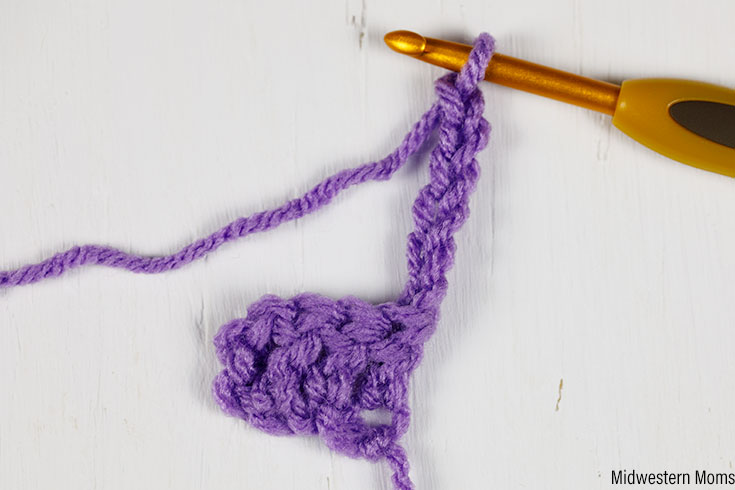
Step 7: Join that square to the top of the other by raising it up and put a slip stitch (
Step 8: Chain 3.
Step 9: DC three stitches into the gap you originally joined into.
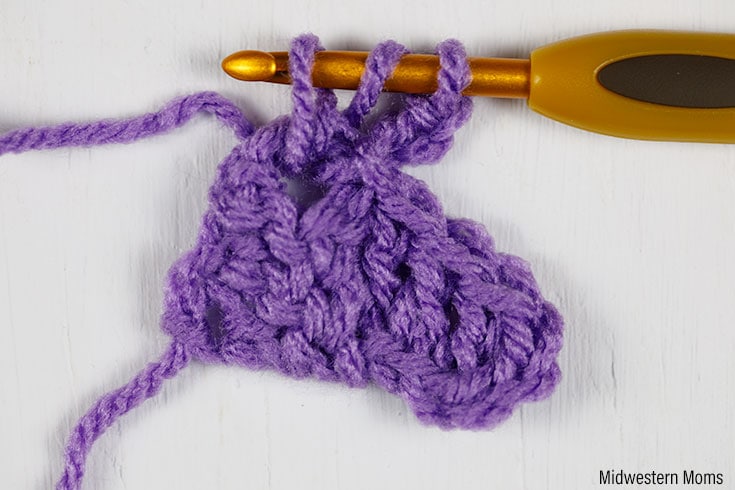
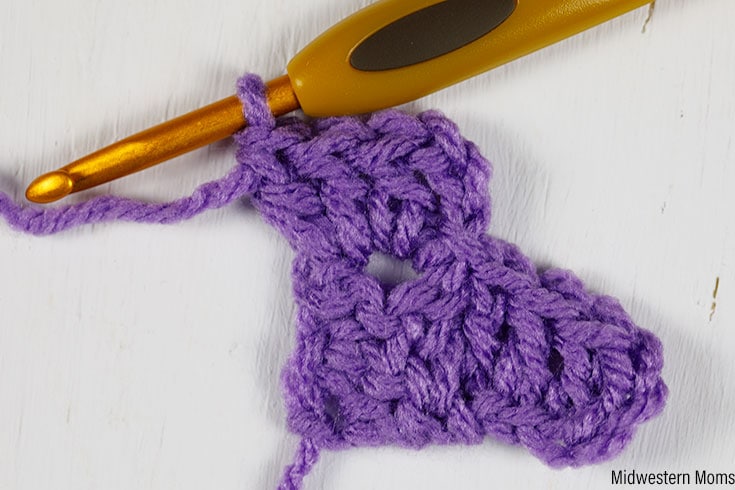
Step 10: You should now have three blocks in the shape of a triangle. Continue this pattern until you need to begin decreasing.
Corner to Corner Crochet Decrease
Eventually, you’ll get to a part of your pattern where no more blocks are required on one (or both) of the edges.
This is where you begin your decrease.
Though this seems difficult, don’t worry!
It’s a very simple process and will give you the power to shape your design as you wish.
Step 1: At the row where you wish to begin the decrease, turn your work.
Step 2: Instead of completing the turning chain as you did to increase, skip this and slip stitch into the top of each of the next set of 3 dc and the gap once (4
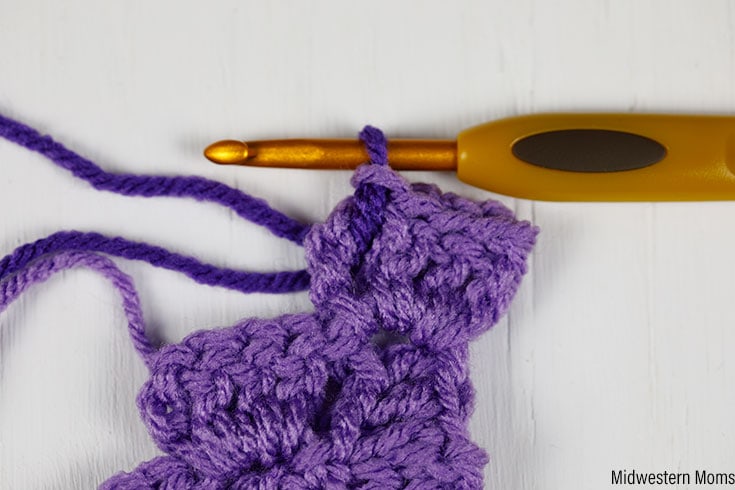
Step 3: Chain 3.
Step 4: Double crochet 3 sts into the gap.
Step 5: Continue working as normal until you get to the end. If you wish to also decrease at the other end (forming a square pattern), simply place
It’s as easy as that!
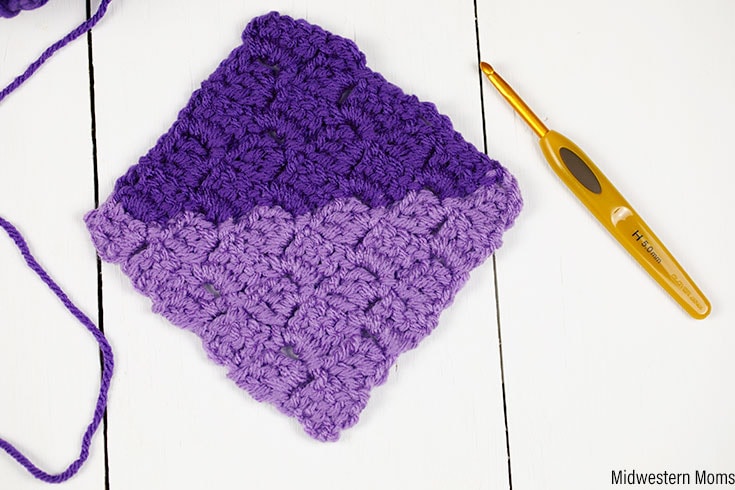
Changing Colors in C2C
The odds are that eventually, you’ll get to a point where your pattern will include a color change in your work.
While color changing in a project like this is simple, carrying your work can be a bit messy, so we’ve included some helpful tips for you about this part at the end of the post!
The method that I prefer to change color in a C2C project is by adding the new color at the slip stitch, rather than starting a new color during the last stitch of the previous block. It makes the change cleaner, and you won’t see a dot of extra color that looks misplaced in your finished work.
- When you are prepared to do the slip stitch to the top of the 3 DC block (the gap), place your hook in the gap, and grab the new color with your hook, pulling it straight through the loop to complete the slip stitch. I typically keep a tail of at least three inches to weave in later.
- Continue crocheting until you need to change to a new color, and follow the above instructions again.
Frequently Asked Questions About Corner To Corner Color Changes
Should I carry my yarn, or cut it off and weave it in?
My general recommendation for carrying colors is this: If you only need to carry it one or two blocks, go ahead and carry it.
If you need to carry it three or more, go ahead and either pull out enough yarn to save so that you can pick it back up at that point on the way back, or cut it off with a long tail so that you can weave it in.
How do I organize all of this yarn when I’m doing multiple color changes?
Bobbins!
I typically use the refrigerator magnet clips for notes or chips. Whatever you use, make sure it has longer handles to wrap your yarn around.
These Susi Bobbins look amazing and they are built for crocheter’s by a crocheter!!
You can easily figure out how much yarn you need to cut and put on a bobbin by figuring out how much yarn it takes to crochet an inch (because one block generally equals about one inch).
Wrap the yarn around the bobbin and use the clip part to clip the end of the yarn so that you can easily pick it back up when you get to that point in your project.
When do I weave in all of these ends?
The best way to deal with ends is as they are happening.
If I’m using the same color, I typically incorporate the ends into my crocheting as I go along if I can.
However, if you cannot do this due to a color change, leave them until you crochet up a few rows. Then I typically go back and weave them in when I get to the ends of the rows. This way it keeps my project nice and tidy.
Remember to go back and forth in at least three different directions when weaving in the ends to secure your work so that it will not unravel, and trim the last bit of yarn as close to your project as you can (without cutting any of the crocheted yarn).
Looking for a project to start?
Crochet Corner To Corner Patterns
Crochet C2C Dishcloth Pattern – This pattern uses the corner to corner method but with half-double crochet stitches (also called Mini C2C)
I am left handed and working on a diagonal stitch . The pattern calls for decreasing and changing colors at the same point. How do I do this?