Mod Podge Tile Coaster Tutorial
This post may contain affiliate links. If you make a purchase through links on our site, we may earn a commission. As an Amazon Associate, I earn from qualifying purchases.
Inspired to start making some great gifts for the holiday season, I decided to try and create some coasters. This tutorial will show you how to make coasters with tile, scrapbook paper and a little Mod Podge. The best part about this craft is that it can be turned into a very beautiful, inexpensive gift – all for less than a few bucks worth of supplies.

DIY Mod Podge Tile Coaster Set
WHAT YOU WILL NEED:
- 4 Tile Coasters (I found for 11 cents at Menards)
- Cardstock
- Paper Cutter
- Mod Podge
- Brush, for Mod Podge application
- Paper Cutter & Scissors
- Felt
- Paper Towels
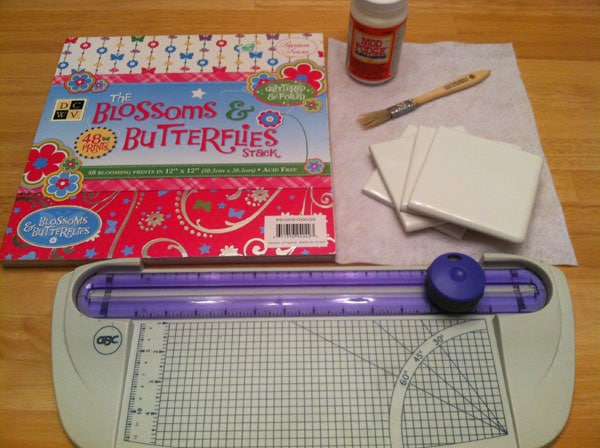
INSTRUCTIONS:
Step 1: Measure and cut 4 pieces of paper to fit on the tops of your tiles. This measurement will depend on the size of tile you have purchased, but I choose to cut my paper about 1/2″ less than the width and height of the tile to allow for a border.
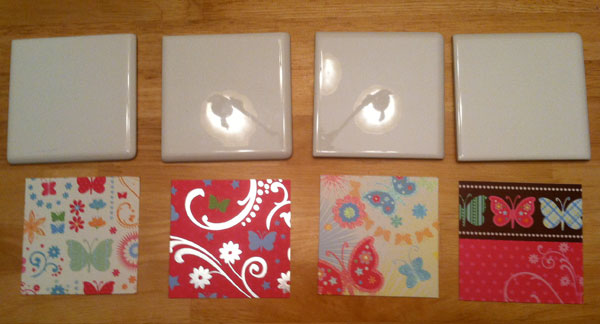
Sorry for the glare in my photos! I was underneath the light in my dining room and you can see the reflection in the tiles!
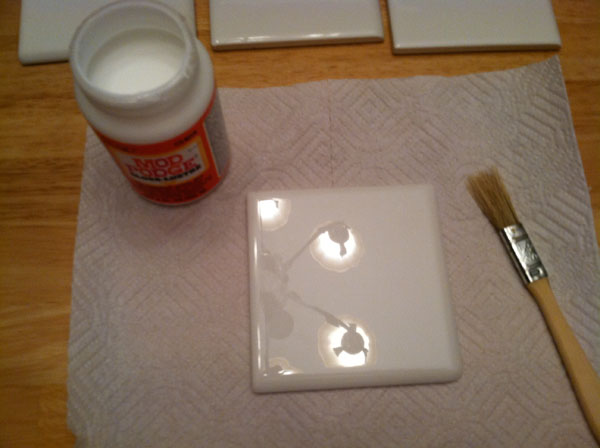
Step 2: Apply a layer of Mod Podge to the tile.
Step 3: Place the paper on top of the tile and press down. I allowed this to dry for about an hour.
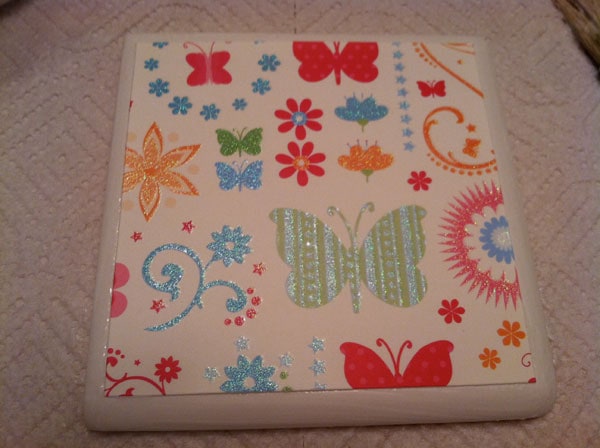
Step 4: Now that the paper is adhered to the tile and won’t slip around, apply a layer of Mod Podge over the top of the paper and around on the sides. When you apply the Mod Podge you will notice that your paper will look white. Don’t worry about this, it dries clear.
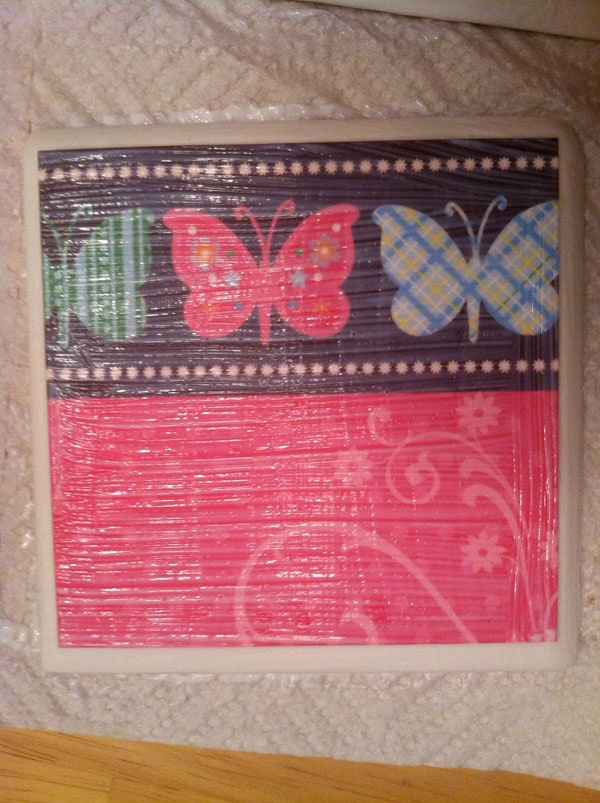
Allow your project to dry fully. I often apply another coat of Mod Podge once it is dry and go through the process again.
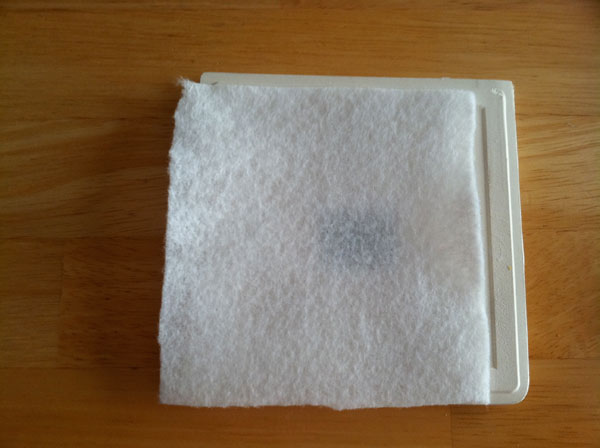
Step 5: Cut a piece of felt the same size as the paper you cut for the front of the tiles. Apply a layer of Mod Podge to the tile and then place the felt in the center. Allow tile to dry fully before you handle. This is the back of the coaster and will allow you to move the tiles around without having to worry about scratching any tabletops.
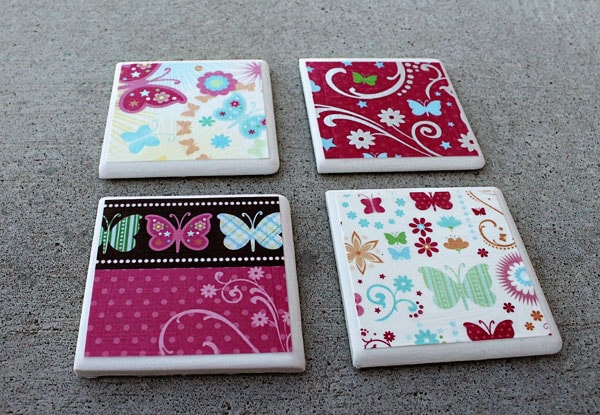
After they dry, here is what they look like.
If you are creating these to give them away immediately, you might also add a spray sealant over the top of the tiles. I’ve read online that it takes Mod Podge approximately a month to cure fully before it is safe to put hot beverages on top.
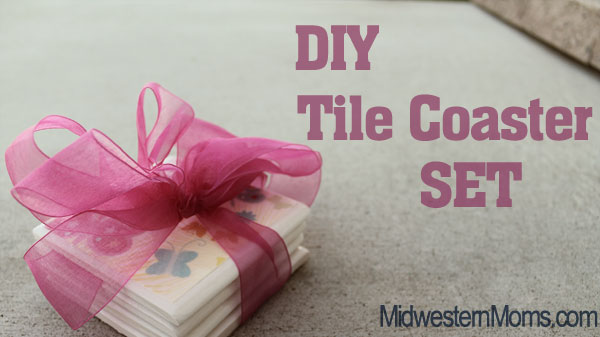
I like to package 4 tile coasters together and tie with a large organiza ribbon when presenting them as a gift. The same process can also be done to add a photo on the coasters. What ideas do you have for making tile coasters?
UPDATE – TROUBLESHOOTING
Since completing my project tutorial using Mod Podge on the tiles I have had several questions and comments left from other users that I wanted to address in my main article so that anyone can read these tips before you begin.
1. If you are using a thinner paper, it is recommended to give it a spray of the acrylic sealer and allow to dry and harden a bit before you add it to the tile.
2. Several people have mentioned getting lines during the application of the Mod Podge (from the brush strokes). On the Mod Podge website they recommend wetting a piece of sandpaper and sanding gently in-between the coats in order to make the finish smooth. Be very careful to do this lightly and with a fine sand paper.
3. Stickiness. Mod Podge can take up to a month to cure fully. Store in a dry place and don’t stack them on top of each other until they are dry completely. If you need them much sooner than a month, try applying several coats of the clear acrylic sealer.
Thanks so much for reading my tutorial. If you have any additional questions or comments, please don’t hesitate to leave them below!
You May Also Like:
- Crochet Patriotic Baby Hat for Girl
- Easy Round Crochet Dishcloth pattern
- Round Dish Scrubbie Pattern
I’m doing these as Christmas gifts too! I started one set to test it out and they look lovely. I am starting now because I have heard that the mod podge needs to completely cure and set for quite some time. One new thing I saw from this post that I will try is applying the felt backing with mod podge as well – I will give that a try on my next set! Thank you!
Yes, I find that apply the backing with Mod Podge while I had it out worked out very well. It seemed to adhere the felt better so it didn’t peel back like it sometimes does.
What a great gift idea! I am so excited to try this. Thanks for the tip- I’m excited to RT via Twitter. :)
How cute!! I wish I had a crafty bone in my body…or the patience to develop one. LOL.
I used to teach in a preschool and did this with handprints for mother’s day. I love this!
Oh I bet that turned out so cute!!! I’ve been wanting to create something with handprints, just haven’t got around to it yet! :)
I wanted to thank you for putting up this DIY turning tiles into coasters. I live on a fixed income with a disability. I started with 4 tiles and made a set. I was delighted with how they turned out. Then I found at Lowe’s white and cream colored tiles for 16 cents each! I bought 24 of them and more paper and finished at 24 last night and this morning they are drying with the felt just put on. They are going to makes such lovely gifts. They are upside down drying but i keep going over there and turning them just to see them again! Love – Love – Love –
Would love to share a picture if you are interested.
Belinda
Thanks for sharing your experience! I would love to see a photo! If you have it uploaded somewhere you may share a link here in the comments!
thankyou so much for being so thorough with your directions and step-by-step pictures. so many times I find myself thinking “is it supposed to look this way at this point?” so I appreciate you! great project.
Thanks for the nice compliments! I appreciate it!
Does anyone know if One scrapbook sheet of paper do all 4 coasters?
If you are cutting the pieces to fit your tiles to be 5×5 or 6×6 then one sheet of 12×12 sized paper will cover all 4, yes. Thanks for stopping by!
I made some of these for a craft show and as gifts. For the backing I used adhesive foam that you can purchase at Walmart. The foam adheres really well and goes on quickly. I also added a hanger (prong hangers made by ook, package of 6, purchased at Menards) so the tiles could be hung if desired. I used our state symbols, rub-on letters, and quotes printed on scrapbook paper. I finished the fronts with Krylon Triple-Thick Crystal Clear Glaze and they looked awesome!
Fantastic ideas Sheila! I’m so glad that you posted about your project! The adhesive foam sounds like a great idea. I’ve recently started to craft more with foam and have more of it on hand so I may try doing some like that also. Thanks!
What a cool idea…love it!!
Sorry I am new to this…what and where can I find card stock?
You can find cardstock at your local craft store (Michaels, JoAnn, Hobby Lobby if you are in the US) or even online. It is sold in the scrapbooking section of major stores like Walmart and Target also.
it is also called poster board – and my local grocery store sells the small size.
What a great idea. Love the papers that you chose. Do you think that cork glued to the back would work, too?
Absolutely Cynthia! In fact, someone else mentioned foam and I thought that would be a good idea too!
My mom made me tile coasters and put a picture of me and two grandaughters together on it…I’ve had it a few yrs. and it still looks good….just put several coats over it. Also you can use the little round felt dots on each corner of the tile underneath to prevent scratching surfaces. Fabric could be used in place of the paper on the top. Just some extra ideas.
Thanks for stopping by Jackie! It is great to know that you’ve had yours for several years! Thanks for the additional ideas!
Gosh I love these! I made them last week for my blog and they turned out so pretty! I am giving away a set on my blog post to a random commenter, so head over and leave a comment if you have time =] Thanks
Cheers,
Natalie
Love those Natalie! Great job!
Hi,
I am trying to do coasters with pictures of my son…I noticed once you apply your first coat
of mod podge on and you let it dry, you can see brush lines. are you supposed to ignore these , sand them out, or what? do these brush lines go away? I want the clearest picture possible without the brush lines.. is this possible using mod podge? thanks
Hi James, thanks for your comment. A lot of it depends on what type of brush you are using to apply your Mod Podge. If you use a regular paint brush, you might try applying a second coat in the opposite direction to get rid of the lines. You can also use a foam brush to apply the glue with success. I hope that helps!
Great idea! I am running into a couple rough patches because I am trying to make 400 of these for my wedding. I am using professionally printed paper on the tiles and only mod podge about 2 coats on top of the picture. I let it dry for about a week and then apply the acrylic spray sealer. However, some of the pictures on my tiles gets discolored after the spray. Any idea why this is happening? Another problem I encounter is that after i stack them together, the tiles sticks together and as i try to pull them apart, the picture gets ripped. So now I am back at square one. Do you have any suggestion or recommendations? Is it because I am not waiting long enough for the tiles to dry before stacking?
Carmen,
With professionally printed paper, it is hard to tell there is a coating on the photo (I know some do coat their photos to give the photo a special type of finish). That could be why it is turning yellow when it come into contact with the Mod Podge.
Also, I have heard that it takes a full month for the Mod Podge to cure fully. That could be why you are still experiencing the stickiness after just a week. I found this article online that talks about the Mod Podge gloss being sticky and that applying several layers of sealant could be the answer. It also talks about the different types of Mod Podge available. There could be one that is easier to use for photos than the regular. http://www.modpodgerocksblog.com/2009/07/mod-podge-formula-guide-youve-been.html
I wish you luck on making 400! Wow! Congrats on getting married! :)
Thanks for sharing this awesome project! I started yesterday and I’m having trouble with the mod podge leaving streaky lines on the photos. I’m using the matte kind with a foam brush and followed the directions exactly so I’m not sure what I did wrong. Does the acrylic spray at the end take care of the brush lines? I doubt it but that’s the only thing I could think of. Any advice would be helpful. Thank you!
Hi Samantha,
It seems like several people have had that problem. I used a cross technique where I put it on lightly, but applied it in a different direction for each coat. I found that this helped minimize the lines. If you are still experiencing lines, I have gone to the Mod Podge website and found that you can wet a piece of sandpaper and sand gently inbetween each layer for a smoother finish. Then spray the sealer on top. I hope this helps!
Wet sanding works! I just tried this and my coasters are so smooth, without brush lines. It’s a miracle LOL!
I was worried because my coasters are for gifts also. I am so pleased, they look so smooth and pretty. Thanks for the helpful advice on sanding . I used 1000 grit wet/dry sandpaper. I bought it at Advanced Auto Parts. $13.00 for a pack of 5 large sheets.
Ok, I have to pick up more tiles so I will get sand paper as well. Thank you for your speedy response!
Anytime Samantha! Good luck and be sure to stop back by and let me know how it worked for you.
Hi Amanda, my wife put 6 coasters together with modern comic book page pics, 5 layers of mod podge, wet sanded with 1200 grit, and coated them with a polyurethane. The first coat of poly looked great, but the moment the second coat was applied 4 days later the finish looked like it was hit with stripper instead of a clear coat. Is there a problem from using polyurethane on top of the mod podge instead of acrylic or enamel or should we look for our culprit elsewhere? Thanks for sharing your experience!
Hi Keith, I have personally never used the poly on the tiles. I usually top with a clear acrylic sealant. I wonder if the chemical in the poly is too strong. I research poly a bit and it appears that it is oil based, which might not work well with the Mod Podge. I have read about several people using poly to give things an aged look, but have never used the product myself. My husband uses it on wood to seal what he has stained, but that is my only experience with that product. Thanks for stopping by and I hope that helps!
After seeing this on Pinterest, I had to give it a try. I bought a pack of clearance travertine tiles in a beautiful slate gray, and several different cardstock and scrapbook papers. They turned out beautiful! I especially love the paper that I found with peacock feathers. It looks classy and elegant.
Great idea!
If you make these with kids pictures can you seal them somehow so that when used as a coaster that it won’t ruin the pictures when your glass sweats.
Minta
Yes, You can spray them with an acid-free clear sealant before you Mod Podge them on the tiles and put another coat on after the Mod Podge.
Do you really have to put a sealer on if you use thinner paper? I just made some of these and used a thinner paper and was just wondering.
I don’t think that you have to, no. There are a lot of factors to consider also (the brush you are using, the paper weight and the thickness at which you apply it). You could do very thin layers and more of them. Whatever you do, please test it out first before you do several tiles. I used a heavier cardstock when making mine, so I definitely didn’t have to spray it first, but I think that people who use thin paper are experiencing the edges curling or the paper bubbling (such as newspaper thin). Just be sure to let it dry completely and do another coat.
Nice post! I made some beer coasters with art (modge podge coatings and then polyurethane and several days to dry) but when placing a hot coffee mug, it left a ring. Do you know any sealant that would handle both cold bottles/drinks and hot drinks (coffee, tea)? Would you acrylic sealant do that?
Hi Jeremy! I would recommend an outdoor acrylic sealer to finish off with. They also recommend a waterproof/enamel sealer on the website.
Thanks…much appreciated!
very cool! i think it would be cool to make a set for each season
I had fun doing mine I am getting addicted to these coastersLOL
I’m intrigued with these coasters. I toyed with the idea of painting individual tiles for my kitchen.
Would these coasters work as wall tile?
Sorry. I was not going to get too busy with the tiles. Just behind the stove and along the counter top, say the 3×6 tiles.
What do you think? How may coats?
I’m not sure how the Mod Podge would react with grout. I don’t have experience with that. If you try it, make sure that you put a pretty strong sealer over the top because it takes Mod Podge a while to cure.
I am so excited to give these a try. A family member has several boxes of tiles that they are wanting to give away so I will be getting them in a couple days…Browns, Beiges, and Tans so I am looking forward to making several sets to give as gifts this holiday season! Thanks for the detailed instructions!
Yay! I would be excited for that too! I love free supplies that I can craft with. Just make sure to not stack them on top of each other while you let them dry. I made that mistake the first time and ruined a set. :(
I was just wondering with all the fantastic things you can do with Mod Podge what is the best mod podge to use for tiles. I have seen so many types of mod podge and I wanted to use fabric to is this a diff type of mod podge?
Thanks
They actually have a Mod Podge for fabric, but I haven’t used it yet. If you try it, stop back by or send me an email and let me know how it works!
Visit your local Habitat for Humanity store. Sometimes they have tile left overs ppl donate. Great repurpose and proceeds go to help build Habitat houses.
Hey i was wondering about how to do the picture for your coaster. I wanted to put a picture of my nephew on the tile coasters. How do i do that? Do i need some special paper or something? Also if im doing xmas gifts and its nov 11 now it did say it takes a month to cure so i should make them asap?
Thanks Mallory! I sent you an email, but wanted to add my response here for other people to see also. I would use a paper weighted heavier than regular copy paper. Photo paper should work fine. Also, in order to get them done by Christmas, use a spray sealant over the top of the tiles. (I just purchased the Mod Podge brand to test this out this weekend. I will update my post if I believe it works well.) Thanks for stopping by!
Great Gift!!! I just try it I mad set of 4 of scrabble coasters since my mother loves to play scrabble make unique gift for x-mas cant wait to see her reaction… plan on making next one with a photo wish me luck… can also be done on canvas that will be my next project
Can you use a finished tile or does it have to be unfinished?!?
I imagine you could use either on this project.
I have been making tile coasters to give as Christmas presents. I used prints from my sister’s paintings to give to her and some from my paintings. They look good. BUT I have made the mistake of spraying them with a sealer which I have since realised is no good at the temperature needed for hot drinks. WARNING read the tin before buying the sealer. When I read the tin it said up to 50 degrees. By that time I had sprayed it on all 35 of my tiles. I am hoping that a few layers of new varnis might work. Might have to keep them for next Christmas.
That is a good tip Jen. Thanks for sharing your experience with us.
Ok, after reading comments I am getting overwhelmed with different types of sealant ? Which do you recommend if they will be used as every day coasters?
I made these this past weekend with 6 teenagers aged 13-17. It was a huge hit with the kids and try turned out amazing! I will be making these for Christmas gifts this year. Thank you for the easy to follow directions and great idea.
Hi,
This looks like a great project. BUT — I do have a question…
How can these cute decorated tiles coated with anything non-porous act as coasters — coasters to absorb moisture rather than make the moisture run off and onto the table you’re trying to protect?
Just wondering…
Thanks, Elly
I’ve never put anything on them that was extremely wet (like it was coming from a cooler). I mostly use them for cans that come out of the refrigerator or my coffee mugs.
yes, i was going crazy making these as christmas presents….put three coats of mod lodge on in 20 minute intervals…then after an hour i applied spray enamel…i read where that would allow for faster “gifting” time…well, after a week of total dry time, i put the felt feet on, stacked them and still ended up with marks where felt touched…i am going to sand them and want to know if i should mod podge over the sanded enamel…tell them gifts are coming…or
do another coat of enamel and wait another month as well…any advice on all my beautiful hard work?
You can try sanding it down with fine sandpaper and see how it turns out. It will depend on how they turn out if you need to redo.
my paper juat peels off. what did I do wrong? does the mod podge finish make a diff? ie. glossy, matte, satin
When you applied the Mod Podge to the tile, did you allow it to dry for an hour? Maybe you didn’t apply enough or maybe you applied too much. I don’t think it would matter on what finish you have.
How do I mode podge a photo on a dried stepping stone made from concrete? I will be decorating
It etc while wet ?
Marge,
I haven’t worked with that type of material before. I would refer to their website for further instruction.
Try using the small size roller with the white foam roller brush for the mod podge, makes for much cleaner application without the lines. :)
Good tip!
Thank you so much for your great instructions and caring enough to give helpful hints and tips, as well so I can avoid some common mistakes. I think I will avoid the whole “hot vs cold coaster ordeal”, and just put hangers on these to hang on the wall instead!
I did the photo coasters and am having a problem. I sprayed them with a clear glossy acrylic after 3coats of modpodge. I let them dry for a month. I out them in a group of four for a gift . When I looked at them,they are all marked up from the felt. Is there anything I can do to fix them?
Please help!
Hi Cindy. Did you put felt on the bottom of the coasters and stack them while the tiles were drying?
No I didn’t. I let them dry for a month before I out the felt on and then I stacked them.
Cindy,
At this point, I don’t know if there is anything you can do about the felt. I would suggest if you did your projects again, make sure to use a Hard Sealant like they use for furniture. Sorry I don’t have better news for you.
Thank you for getting back to me.
I am going to try another coaster and use a spray polyeurathane and see what happens. I will let you know how that works. Thanks again.
Good Luck! I hope it works for you.
I am a crafter who try’s a lot of different crafts, so I’m going to try these for my next show. My question is if I make a set of 4 and tir ribbon around them is $10 a fair price?
It has been a while since these have been made. I would take into consideration your cost of supplies and time and divide that between how many sets you make. That will determine what you will need to price them to break even. Then you can adjust the price from there.