• Home
  • Crafts
  • Crochet
    • Crochet Dishcloth Patterns
    • Crochet Headband Patterns
    • Crochet Baby Hat Patterns
    • Crochet Dish Towel Patterns
  • Recipes
    • Best Rice Krispie Treats
    • How To Blanch Hazelnuts
    • Mini Pumpkin Pies with Graham Cracker Crust
  • Lifestyle
    • Travel
    • Blogging Tips
↑

Midwestern Moms

Life Captured

  • Home
  • Crafts
  • Crochet
    • Crochet Dishcloth Patterns
    • Crochet Headband Patterns
    • Crochet Baby Hat Patterns
    • Crochet Dish Towel Patterns
  • Recipes
    • Best Rice Krispie Treats
    • How To Blanch Hazelnuts
    • Mini Pumpkin Pies with Graham Cracker Crust
  • Lifestyle
    • Travel
    • Blogging Tips
You are here: Home / Crafts / How to Make an Origami Kusudama Flower

How to Make an Origami Kusudama Flower

Crafts

This post may contain affiliate links. If you make a purchase through one of these links, I do receive commission. For information, read my full privacy policy. Before reading our posts, please review our disclaimer.

In the spirit of Earth Day, I wanted to do a craft that involved using leftover paper. Because I love to scrapbook, I often have random sizes of paper cut from larger sheets that I save for smaller projects like this one. I searched the Internet for how to make a paper flower and came upon this tutorial.

Here is my version of the tutorial with the flower that I made. Isn’t it cute?

How to Make Paper FlowersHow to Make an Origami Kusudama Flower

Supplies

  • 5 Sheets of 6″x6″ paper
  • Glue (I used glue dots for this project, however you can also use your glue gun or double-sided tape)

Instructions

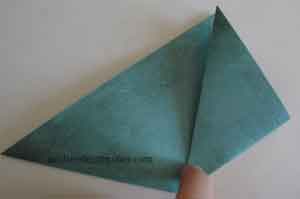
Step 1:  With the patterned side of the paper down, fold the paper diagonal, creating a triangle.

Origami Flower Step 1

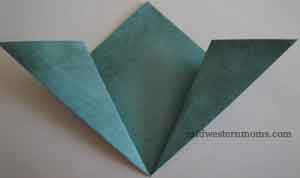
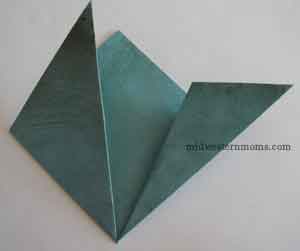
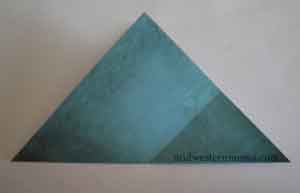
Step 2:  One at a time, take the bottom points of the triangle and fold them in toward the top point.
Origami Flower Step 2

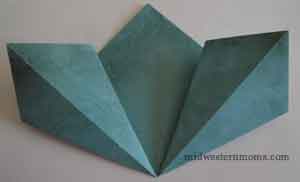
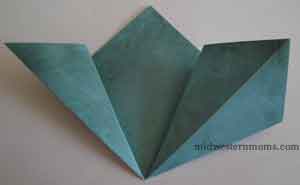
Origami Flower Step 2aStep 3:  Take the points you just folded and fold them back, facing themselves until you get the diagram below. Do this to both sides.

Origami Flower Step 3

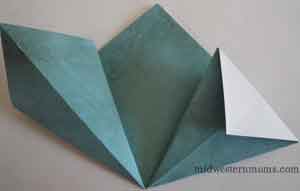
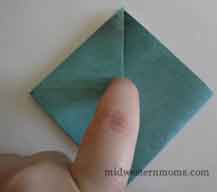
Origami Flower Step 3aStep 4:  Using your index finger, insert your finger into the fold you just created. Pull the fold out and press it down flat, creating a squash fold. Do this to both sides.

Origami Flower Step 4

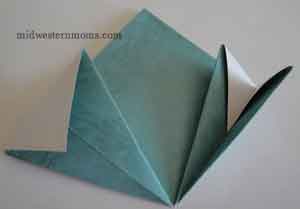
Origami Flower Step 4aStep 5:  Fold the points down on both the left fold and the right fold. The below diagram shows the right fold only. Do this to both sides

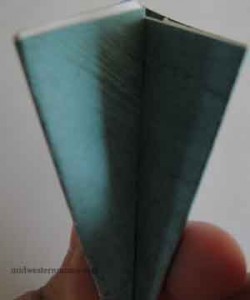
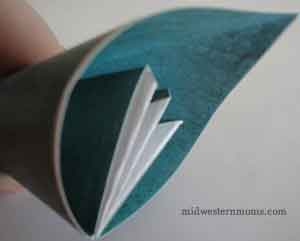
Origami Flower Step 5Step 6: Fold the outer flaps in, toward one another, forming the interior of the flower. Do this on both sides.

Origami Flower Step 6Step 7: Using your glue dot, or whatever form of glue you have chosen to use, glue this piece together.

Origami Flower Step 7Step 8: This completes one petal. Create 4 more making a total of 5 petals.

Origami Flower Step 8Step 9: Once all 5 petals are created, use your glue to attach them each together. Be sure to put your glue as far toward the inside portion of the paper as you can. Here is what your end result should look like!

Finished Flower

Ideas: Have some fun with this project! Create flowers with a holiday patterned paper to add to your gifts instead of store bought bows. Create several of these to insert into a centerpiece for your family dinners. Attach a pipe cleaner at the bottom and group several together to create a wedding paper bouquet. The possibilities are endless! If you decide to try out this project, please come back and let me know how yours turned out!

Linked up at:
Filed Under: Crafts

About amanda

Amanda is a work at home mom and owner/editor of Midwestern Moms. She enjoys reading, crafting and finding great new projects on Pinterest!

Comments

  1. Aimee says

    April 16, 2011 at 5:27 pm

    Oh boy- Origami was never my thing. I tried so hard with it too! Great project! I am envious ;-)

    Reply
    • amanda says

      April 16, 2011 at 5:45 pm

      Aimee, you should try this out. I’ve never been the best with origami either, but these folds were pretty simple.

      Reply
  2. Christy, HOMEmomMADE says

    April 17, 2011 at 5:07 pm

    Just found your blog googling deals for moms, glad I found this though. I’ll be hosting the 3rd edition of Make & Share Friday – Saturday, I’d love for you to stop by and link up .)

    Reply
    • amanda says

      April 17, 2011 at 5:39 pm

      Absolutely, I will have to stop back by on Friday. Who knows, maybe I’ll have some more crafts done by then :)

      Reply
  3. Annaika says

    January 16, 2013 at 9:26 am

    This is so cool i love that it has step by step things so that you can do this cut flower.

    Reply
  4. alka says

    February 13, 2013 at 2:58 am

    The tutorial instructions are perfect. Very beautiful

    Reply

Leave a Reply Cancel reply

Your email address will not be published. Required fields are marked *

This site uses Akismet to reduce spam. Learn how your comment data is processed.

Devon from Midwestern Moms

Hi. I'm Devon.

Midwestern mom of two boys. I love recipes, DIYs, crochet, essential oils, and coffee! Read More About Midwestern Moms

Reader's Favorites

  • 4th of July Rice Krispie Treats 4th Of July Rice Krispie Treats
  • The BEST Rice Krispie Treats EVER! This recipe makes your treats into ooey gooey goodness! You will never make the original recipe again! The BEST Rice Krispie Treat Recipe EVER!
  • How to Blanch Hazelnuts. Hint: It is pretty easy! How To Blanch Hazelnuts
  • Zesty Italian Pasta Salad in a large crock-like bowl. Zesty Italian Pasta Salad
  • Sage Green crochet dishcloth that is folded in quarters is sitting on old barn wood background. The dishcloth is made with single crochet stitches. Quick and Easy Crochet Dishcloth Pattern
As an Amazon Associate, I earn from qualifying purchases.
  • About
  • Disclosure Policy
  • Privacy Policy
  • Recipes
  • Crafts
  • Crochet

Copyright © · Midwestern Moms | Missouri | All Rights Reserved


Midwestern Moms is owned by Copsey Media, LLC
Copyright ©2022, Midwestern Moms. All Rights Reserved. Design by Pixel Me Designs
Midwestern Moms uses cookies to ensure you get the best experience on our website. If you continue to use this site we will assume that you are happy with it. OkPrivacy Policy