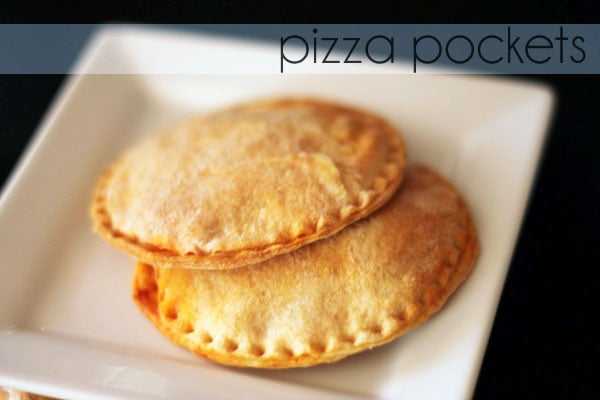
• Home
  • Crafts
  • Crochet
    • Crochet Dishcloth Patterns
    • Crochet Headband Patterns
    • Crochet Baby Hat Patterns
    • Crochet Dish Towel Patterns
  • Recipes
    • Best Rice Krispie Treats
    • How To Blanch Hazelnuts
    • Mini Pumpkin Pies with Graham Cracker Crust
  • Lifestyle
    • Travel
    • Blogging Tips
↑

Midwestern Moms

Life Captured

  • Home
  • Crafts
  • Crochet
    • Crochet Dishcloth Patterns
    • Crochet Headband Patterns
    • Crochet Baby Hat Patterns
    • Crochet Dish Towel Patterns
  • Recipes
    • Best Rice Krispie Treats
    • How To Blanch Hazelnuts
    • Mini Pumpkin Pies with Graham Cracker Crust
  • Lifestyle
    • Travel
    • Blogging Tips
You are here: Home / Recipes / Pizza Pocket Recipe

Pizza Pocket Recipe

Recipes

This post may contain affiliate links. If you make a purchase through one of these links, I do receive commission. For information, read my full privacy policy. Before reading our posts, please review our disclaimer.

Jump to Recipe

Easy pizza pocket recipe to turn dinner time into family cooking night! Everyone can enjoy their own homemade pizza pocket they help create!

Easy pizza pocket recipe to turn dinner time into family cooking night! Everyone can enjoy their own homemade pizza pocket they help create!

Pizza Pocket Recipe

Pizza pockets are a fun meal to make when you have smaller appetites to feed.

These hand-held pizzas are also easy to prepare in advance and pop in the oven once the kids come home from school, or before you are having people over to watch the game.

Making pizza pockets at home is more daunting than simply purchasing similar products in the freezer section of your local grocer, but I enjoy the fact that I can control the ingredients list and customize each pocket.

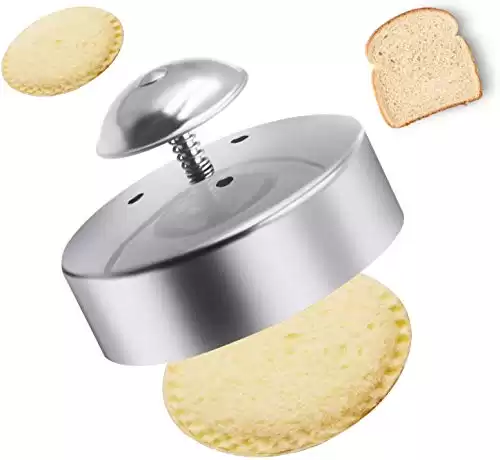
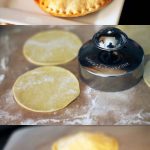
There was one important tool that I used during the creation of the pizza pockets, the Pampered Chef Cut-N-Seal. This product is fantastic at cutting the dough for the pockets and sealing them up.
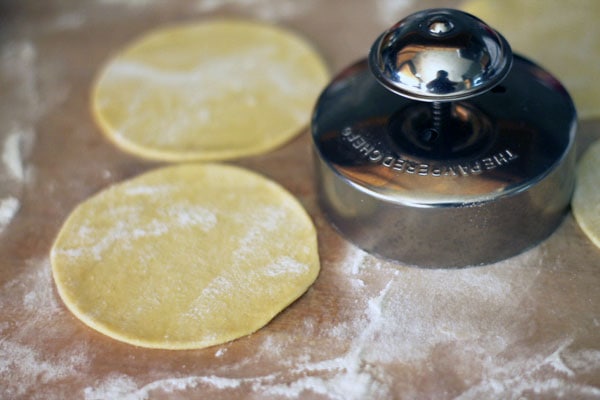
CutNSeal

In the first step of this recipe you will roll out your dough and then use the Cut-N-Seal tool to create the round shape.

To do this, you simply press down on the outsides of the device (not the knob on top – when you press that, it will create the seal).

Filling

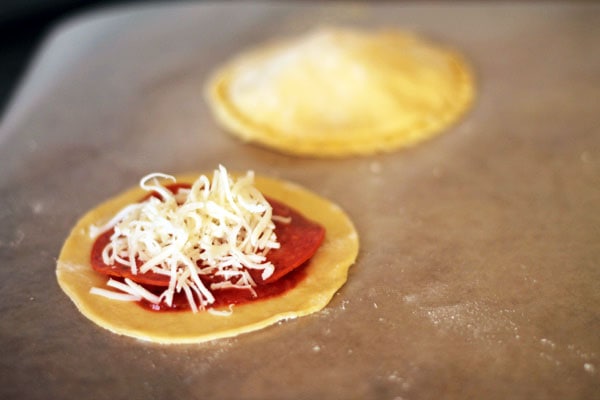
Fill up your pizza pockets with yummy ingredients (sauce, pepperoni, and mozzarella cheese shown here) and then add another layer on top and press down with the Cut-N-Seal tool to seal up your pocket.

The Pampered Chef Cut N Seal
Buy from Amazon Learn More
We earn a commission if you click this link and make a purchase at no additional cost to you.

Print
clock clock icon cutlery cutlery icon flag flag icon folder folder icon instagram instagram icon pinterest pinterest icon facebook facebook icon print print icon squares squares icon
Delicious Pizza Pocket Recipe. Build them to your taste!

Pizza Pocket Recipe

★★★★★ 5 from 1 reviews
  • Author: Midwestern Moms
  • Prep Time: 30 minutes
  • Cook Time: 15 minutes
  • Total Time: 45 minutes
  • Yield: 4 pizza pockets 1x
  • Category: Main Dish
  • Method: Bake
  • Cuisine: American
Print
Pin

Description

The perfect dinner idea when everyone loves a different kind of pizza.


Scale

Ingredients

  • 2 cans (8 oz) Pillsbury® Crescent Recipe Creations® refrigerated seamless dough sheet
  • 1 Jar Pizza Sauce
  • 1 Package Pepperoni Slices
  • 1 Bag Shredded Mozzarella Cheese
  • Flour to dust your surface if you roll out the dough
  • Butter to brush lightly over top

Instructions

  1. Preheat over to 350 degrees Fahrenheit.
  2. Open the crescent roll cans and lay out flat on a surface. I put a little flour on my surface and used a rolling pin to roll them out pretty thin. Note: Don’t use too much flour, just enough so that they won’t stick.
  3. Using the Cut-N-Seal tool (or a large, round cookie cutter) cut out circles in the dough.
  4. On half of the circles, add one tsp pizza sauce and spread not quite to the edges. Then add a few pepperoni slices, and mozzarella cheese. Exactly amounts aren’t important, as you will be making these to suit your tastes. Watch how full you fill these because you don’t want the sauce to squeeze out the side when you create the pocket. (See Notes for more suggestions)
  5. Cover the pizza with an empty dough circle and stretch a bit so that the edges meet.
  6. Using your Cut-N-Seal (or a fork if you used a cookie cutter above) press the edges together.
  7. Bake at 350 until the dough is light brown and flaky, approximately 10-15 minutes.
  8. Lightly brush tops of pockets with butter for taste (optional).

Notes

Tip: You can add any pizza topping you like: mushrooms, onions, cooked sausage, olives, etc)

Keywords: pizza pockets

Did you make this recipe?

Tag @devcops on Instagram and hashtag it #midwesternmoms

The next time that I make these, I believe that I will try to cut the top piece of dough a bit larger than the bottom, to accommodate for more ingredients to be added to the pocket.

More Pizza Recipes

  • Easy Pizza Casserole Recipe
  • Pizza Pocket Recipe
  • Valentino’s Hamburger Pizza

Filed Under: Recipes

About Devon

Devon is a work at home mom and owner/editor at Midwestern Moms. In her spare time, you can find her hanging out with her family, curled up with her Kindle Fire, or playing computer games with her hubby.

Comments

  1. Ronda Abbott says

    July 23, 2016 at 5:16 pm

    Can you make these a head,than freeze them.

    Reply
    • devon says

      July 24, 2016 at 10:03 am

      Ronda,
      I have not made them ahead of time to put in the freezer so I am unsure about that. Sorry I don’t have a good answer for you.

      Reply
      • Jolene says

        September 19, 2016 at 3:53 pm

        I am keeping these all the time. I cook them according to the recipe then freeze them. My husband takes them to work and just microwaves them. They are convenient for him and he loves them.

        Reply
        • devon says

          September 19, 2016 at 3:56 pm

          Awesome! Glad he likes them and they are convenient!

          Reply
  2. Nu says

    July 10, 2020 at 4:24 am

    Can they be fried instead of putting into the oven?

    ★★★★★

    Reply
    • Devon says

      August 4, 2020 at 4:53 pm

      I have not tried to to fry them so I don’t have a good answer for you. Sorry.

      Reply

Leave a Reply to devon Cancel reply

Your email address will not be published.

This site uses Akismet to reduce spam. Learn how your comment data is processed.

Devon from Midwestern Moms

Hi. I'm Devon.

Midwestern mom of two boys. I love recipes, DIYs, crochet, essential oils, and coffee! Read More About Midwestern Moms

Reader's Favorites

  • Delicious Cajun Chicken Alfredo that is full of flavor and easily made in the slow cooker! Slow Cooker Cajun Chicken Alfredo Recipe
  • How to Blanch Hazelnuts. Hint: It is pretty easy! How To Blanch Hazelnuts
  • Crochet Heart Pattern How To Crochet A Heart Plus DIY Heart Garland
  • The BEST Rice Krispie Treats EVER! This recipe makes your treats into ooey gooey goodness! You will never make the original recipe again! The BEST Rice Krispie Treat Recipe EVER!
  • Free Crochet Dishcloth Pattern Half Double Crochet Dishcloth Pattern
As an Amazon Associate, I earn from qualifying purchases.
  • About
  • Disclosure Policy
  • Privacy Policy
  • Recipes
  • Crafts
  • Crochet

Copyright © · Midwestern Moms | Missouri | All Rights Reserved


Midwestern Moms is owned by Copsey Media, LLC
Copyright ©2021, Midwestern Moms. All Rights Reserved. Design by Pixel Me Designs
This site uses cookies: Find out more.